45 print and cut labels cricut explore air 2
Cricut Explore Air 2 Beginner's Tutorial | How to Cut Vinyl Start crafting with the Cricut Explore Air 2 and this step by step tutorial for cutting vinyl. The perfect project for new Cricut crafters! ... Cutting Vinyl with Cricut Explore Air 2™ - Beginner Craft. Save ... St. Patrick's Day Free Printable- DIY St. Patrick's Day Party Hats. Address Labels with Cricut - Crafting in the Rain Print then cut address labels. Start by creating a rectangle that's 2.8 inches wide by .8 inches tall. Type 3 separate text lines. The first is your name. The second and third are your address. By keeping them as separate lines, they will be easier to space properly. Choose a font for your name. Feel free to make your name a different font ...
Making Return Address Labels with your Cricut Explore - Mean Right Hook 4. Select both your name layer and the rectangle layer, then weld them together. 5. Next write out your address. I picked a cute san serf font. Then select both the label layer and the address layer and center horizontally align them so the address is on there straight. 6. I wanted to use the Print Then Cut feature, so I changed my address to ...

Print and cut labels cricut explore air 2
HOW TO MAKE LABELS WITH CRICUT | PANTRY LABELS - Pinterest This video I am going to show you how I make my own labels using my cricut explore air 2... Jun 12, 2019 - #diylabels #cricutexploreair2 #howtomakelabelsWelcome to my channel! ... Make these easy DIY pantry labels with vinyl or cardstock and the print then cut feature with your Cricut Machine. I got all the supplies for this project at my local ... Using the Print then Cut Feature with Cricut Explore Air 2 Plus FREE ... Make sure your paper is loaded into your printer and then click "Print Page." You will be prompted by your printer to select print. Place your printed paper on the cutting mat and load into the machine. Make sure your dial is set to the appropriate material. Press the Cricut logo on the machine to start cutting. Print then Cut Stickers with the Cricut Explore Air 2 Here is how to print then cut stickers on your Cricut Explore Air 2 Materials Needed Cricut Sticker Paper Cricut Markers Directions In Cricut Design Space, insert image and search for cat clip art. Then add the image to your new file. With the cat selected, change the icon from print to write and select the colors you want the cat to be.
Print and cut labels cricut explore air 2. How to Use Cricut Print And Cut With Avery Transfer Sheets You need to press "Save as a Print Then Cut image" and then click "save". 5. After you have saved your image, you can now upload it to your canvas in Design Space. Select the cactus image and click "insert image". Now that you're image has been inserted, let's add some text and resize the image so that it will fit on a onesie. Print and Cut with Cricut Explore Air 2 - YouTube Create this mini mother's Day banner using the free file download at and using the p... How to Make Product Labels using Cricut Explore Air 2 #cricutmade ⭐️ SHOP CRICUT EXPLORE AIR 2 - video is sponsored by Cricut☁️How to design and make labels waterproof - ... Cricut Home All-new Cricut Explore® 3 ... From cutting machines to crafting essentials, Cricut products make it easy to create just for fun, for friends & family, or even for a small business. Made with Cricut. See what you can make possible with Cricut machines, tools, materials & accessories. Make happiness in minutes. Cricut Joy™
How to Make Labels with a Cricut | The DIY Mommy - YouTube Learn how to make DIY vinyl labels with Cricut for organizing your home or labeling handmade products! Subscribe to my channel for more DIYs: ... Print & Cut Label Tutorial in Cricut Design Space Take the printed page with the black border and place it on your mat. Load it in the machine with the "arrow" button, and Press the "C" button to start the print and cut. When the images are cut, remove the mat and you will have beautiful stickers. Please let me know if you have any questions or if one of the steps is not clear. Print Then Cut: DIY Baby Closet Dividers with the Cricut Explore Air 2 You'll print out the design first (print out all four pages, make sure ' Add Bleed ' is selected), and cut on LightGrip blue mat. If You're Designing Closet Dividers Yourself In Design Space… Open up your Cricut Design Space application on your phone or desktop. Click on ' Image ' in the left toolbar, and search for ' door hanger '. How to Write on Tags & Labels With Cricut Pens With a (gold) pen inserted into slot A on your machine (I used the 2.0 weight ), load your template back into the machine and hit the flashing Cricut button. The machine will then re-cut your single "registration" mark (the upper left square) and then proceed to write directly onto your pre-cut items! If you have lots of labels to make ...
How To Use Cricut Print And Cut With Printable Vinyl - DIY Stickers! How To Use Cricut Printable Vinyl 1. Create a new project, click 'upload' and then 'upload image'. 2. Click 'browse' and select the image you would like to upload. click 'open' and then 'continue'. For this project I'm using a set of ice cream clipart. I think they are so cute! 3. Select the image type. Complete Print Then Cut Cricut Guide - Analytical Mommy LLC When you want to Print then Cut something using your Cricut machine, it's key to setup the design correctly in Design Space. There are two things that you must make sure you do: You must switch the "Operation" option to "Print then Cut >> Standard" itch setting from "cut" 2. Then you need to click "Flatten" on the bottom right. Printable Clear Sticker Paper: Cutting and application instructions Use the fine point blade (this is the blade that comes installed in the machine). Explore: turn the Smart Set dial to "Custom" and select the "Clear Printable Sticker Paper" setting. Maker: select the "Clear Printable Sticker Paper" setting. Press CUT. Peel the sticker paper from the liner and apply by hand. Tip: Use only an inkjet printer. Printable Labels with Print then Cut on Your Cricut Machine Then put it in your Cricut Explore Air 2 once prompted. Be sure to turn your dial to custom and pick printable vinyl from the custom materials list. The machine will first find the edge then it will cut each of your labels. You are left with perfectly cut labels that can be used on any project! Step 4: Covering Boxes in Vinyl

How to Make Stickers Using Cricut Print then Cut - Make Life Lovely
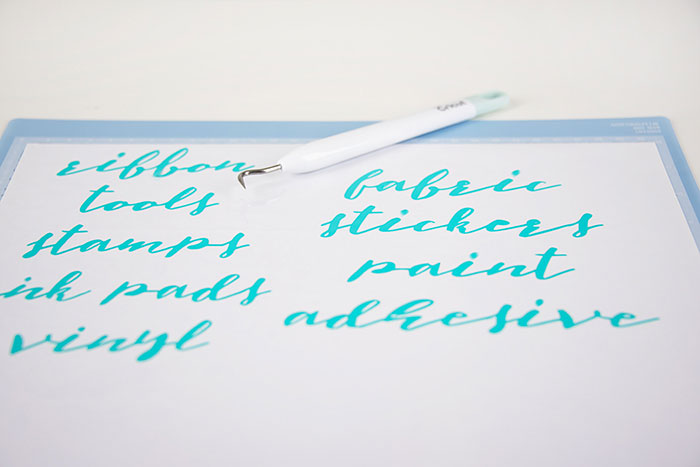
How to Make Vinyl Labels with a Cricut Cutting Machine Step 2- Create your design. If you are using a Cricut machine, you can find my exact project in Cricut Design Space here. To design my labels, I used a Cricut font called Balega Std Regular. I measured the bins I was labeling to figure out the best size, and I ended up using 55 pt font for my project. I simply typed out my wording to my desired ...

The Cricut Lovers Guide to Design Studio: Full list of Cricut carts with fonts... AND samples!
How to Make Stickers Using Cricut Explore Air 2 - SugaBaby Co Cricut Explore Air 2. Sticker Paper. Color Printer. Light Grip Mat. Step 1. Upload your image from external source via PNG file or create an image in Cricut design space. (We love to choose images included with the Cricut subscription) Select the chosen image and add an OFFSET (found in the upper tool bar of design space).
Organizing Your Life with Your Cricut Machine! | Cricut
Print and Cut Labels - Cricut Maker - YouTube Learn how to use the print and cut feature to create clear labels/ stickers.Affiliate Links:Amazon:Silhouette Clear Sticker Paper: ...

Which Cricut is Best? Cricut Maker vs. Explore Air 2 vs. Joy | The DIY Mommy
Print Then Cut: How To Make DIY Stickers With Cricut Explore Air 2 By choosing to flatten our images, we are creating just ONE layer to print and then cut. Print Then Cut Your Design At the time of this writing, Cricut Print Then Cut designs need to be within the dimensions of 6.75″ and 9.25″, and printed onto a standard size piece of paper (or in this case sticker paper) that measures 8.5″ x 11″.

Print & Cut Label Tutorial in Cricut Design Space ~ Crafting a Family
PDF How to make labels on cricut explore air 2 - ihdbd.org The biggest differences between Cricut Explore 3 and Cricut Explore Air 2 (see details below) is that Cricut Explore 3 can cut "matless" Cricut Smart Materials, meaning you are not limited to the length of a cutting mat. You can cut up to 12′ of material in a single go. It also cuts these materials up to 2x faster than materials on a mat ...

Cricut Explore Essentials: How to Make Pretty Organizing Labels » Christene Holder
How to Make Stickers with Cricut Explore Air 2 - Print On Demand World Go to the Cricut Design Space App and open a new canvas 2. Upload your saved sticker file, adjust the paper's size and print it 3. Place your printed project over the mat, and just let the machine do the final cutting Well, does it sound exciting?

CRICUT PRINTABLE STICKER PAPER 8.5X12 for Cricut Explore Air 2 Machine NEW | eBay
How to Print and Cut Round Stickers on the Cricut Go to Design Space at Click New Project Click the Upload button Browse, find, and upload the sticker file On the next screen, under "Select Image Type," choose Simple then click Continue. On the next screen, just click Continue. On the next screen, keep it selected as "Save as print then cut image" then click Save.

How to Create Personalized Stationery With the Cricut Explore Air 2
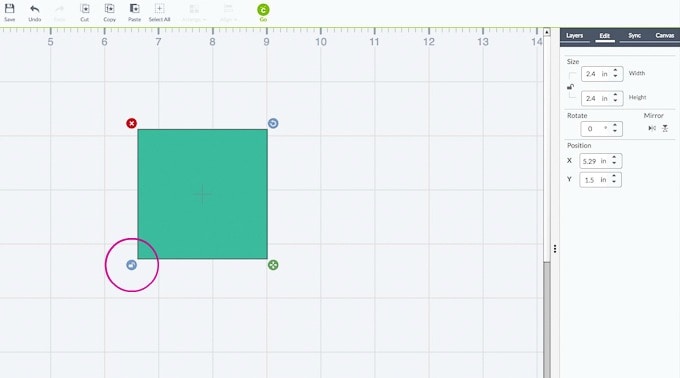
How to Use Cricut Flatten to Make Foil Address Labels On a new canvas in Cricut Design Space add a new shape. Click on Square and turn off the size lock. Change the size to 1 inch high by 2.625 inches long (standard return address label size). Then change the color to white. Insert a text box and type in your address. (This is not my actual address, lol!)

HOW TO MAKE STICKERS WITH A CRICUT USING PRINT THEN CUT AND THE OFFSET TOOL | EVERYDAY JENNY
How to make labels with Cricut Make labels with Cricut Step 1 To design from scratch, click "New Project" on the home page of Cricut Design Space. Step 2 Once on the canvas, on the left-hand navigation bar, you'll see an option for "Images." Step 3 Click that button. You'll now be able to search in the Cricut image library!

Cricut Explore Essentials: How to Make Pretty Organizing Labels » Christene Holder
How To Use Cricut Print Then Cut / DIY Labels and Stickers In today's video you will see how easy is it to use Cricut's print then cut feature to make labels. I use it today to make some labels for strawberry jam. I also use this feature a lot to make...

Inkjet Printable Print & Cut A4 Sheets - Cameo 4 - Cricut Maker - Explore Air 2 | eBay
Print then Cut Stickers with the Cricut Explore Air 2 Here is how to print then cut stickers on your Cricut Explore Air 2 Materials Needed Cricut Sticker Paper Cricut Markers Directions In Cricut Design Space, insert image and search for cat clip art. Then add the image to your new file. With the cat selected, change the icon from print to write and select the colors you want the cat to be.

Cricut Explore Essentials: How to Make Pretty Organizing Labels » Christene Holder
Using the Print then Cut Feature with Cricut Explore Air 2 Plus FREE ... Make sure your paper is loaded into your printer and then click "Print Page." You will be prompted by your printer to select print. Place your printed paper on the cutting mat and load into the machine. Make sure your dial is set to the appropriate material. Press the Cricut logo on the machine to start cutting.
Cricut Explore Essentials: How to Make Pretty Organizing Labels » Christene Holder Home
HOW TO MAKE LABELS WITH CRICUT | PANTRY LABELS - Pinterest This video I am going to show you how I make my own labels using my cricut explore air 2... Jun 12, 2019 - #diylabels #cricutexploreair2 #howtomakelabelsWelcome to my channel! ... Make these easy DIY pantry labels with vinyl or cardstock and the print then cut feature with your Cricut Machine. I got all the supplies for this project at my local ...

Make Craft Room Labels with Cricut Joy - Pineapple Paper Co. in 2020 | Craft room, Storage ...

Print & Cut Label Tutorial in Cricut Design Space ~ Crafting a Family

How To Print And Cut On Cricut (Detailed Tutorial Guide)

Pin on Cricut Explore Air Tips

Cricut Print Then Cut Planner Stickers - Damask Love
Post a Comment for "45 print and cut labels cricut explore air 2"